Showing posts with label decor. Show all posts

Monday, December 2, 2013

First Okinawa Thanksgiving

This past week has been pretty hectic between Jake coming home, Thanksgiving, and getting Christmas presents sent off in time. Jake has been super busy with work since he got back but he did have some time over the long weekend to relax.

We spent Thanksgiving with two other couples. We all cooked some of the meal, but my friend was nice enough to host and to make the turkey. She did such a good job, especially for her first turkey. I told her I was super glad she did the turkey because I hadn't ever done one either and I didn't want to mess it up All of the food was so good and we probably had enough to feed at least 15 people. We had fun eating, playing games, and staying up really late. It was so much fun that it helped us keep our minds of off missing family during this holiday. I would say it was a successful first Thanksgiving on the island.

I didn't get any pictures of the people on Thanksgiving, but don't worry, I managed to get pictures of the food

Those are just the appetizers

Sausage balls, my favorite Thanksgiving tradition


Friday we slept, a lot. Mostly because Jake was still catching up on sleep from his trip. We also ate tons of leftovers. I did a bit of Black Friday shopping online and wasn't one bit sad I was missing it back in the states, since that is my least favorite Thanksgiving tradition. That night we went to our favorite ramen place and then to see Catching Fire. Ramen the day after Thanksgiving may be our new tradition. The movie was pretty good, but as always the book was better.

Saturday morning we watched the Cowboys game on rewind while we ate pumpkin pie. I knew Jake was sad about missing his tradition of watching the game on Thanksgiving, but he was a good sport about it. Somehow we managed not to hear the results of the game before we watched it. The rest of the day we unpacked and cleaned. The house got a bit out of control when Jake got home. If you know anyone in the military, you know how much gear that have. It looked like the Marine Corps threw up in our house. That night we had a photo shoot with a photographer on the beach for our Christmas cards. Late, I know, but not by choice. Hopefully we will be able to get them out before Valentine's Day.

After dinner at a local Japanese restaurant Saturday night, Jake got a call that he had to go into work on Sunday. Let's just say I was not a happy girl since we already had plans to get out and explore. I tried to hide my disappointment so I wouldn't make Jake feel bad since I knew he wasn't excited about going into work either. We did have some time Sunday morning to make breakfast, get some Christmas shopping done, and grocery shop, our favorite thing to do together.

While Jake was gone, I managed to get some Christmas decorating and wrapping done. I don't go all out with my decorations, but I do like some little hint of Christmas here and there. Christmas cheer always puts me in a good mood.


This DIY felt garland was easier to make than I was expecting

As soon as Jake got home from work, we went for our Sunday beach walk. I have to say, the weather here has been absolutely incredible. I won't ever complain about not getting a fall if I can have a winter like this. The mornings and evenings are cool, but the days get up to the low 70s and it is perfect. I have only been through 2 seasons here so far, but I am really thinking that winter might be my favorite.


Lexie loves laying outside all day


That's about it. Sorry I don't have anything more exciting to share. This week I am finishing up Christmas shopping so I can start preparing for Thailand. Less than 20 days, how crazy??

How was your Thanksgiving? Did you do any Black Friday Shopping?


Linking up with Logan, Sami, Kimberlee, and Carissa

Monday, August 26, 2013

Work Space Inspiration


Since I have been living a nomadic lifestlye for the past 3 months, I haven't been able to do much designing, decorating, or DIY. I am going NUTS! I can't even buy any house things since our stuff is currently sitting in crates in Japan and we can't take much else over there. This is a big deal since I actually like shopping for house stuff more than I like shopping for clothes! I walk through Homegoods and Tj Maxx and get on pinterest and feel such a need to decorate something and then get sad when I realize I can't. I can't wait until we are settled in again so I can unleash my urge to decorate. 

Until then, I will just pin ideas I have and stay far away from home decor shops. Lately I've been loving cute little home offices. I usually do my work in bed or on the couch, but I think it would be so nice to have a little work space to sit on the computer and to organize papers and junk. I am sure any office space we have in the near future will be small, but I have seen so many inspiring images of small workspaces I know I could make it work. 


You should go look at the rest of this cute apartment. It is GORGEOUS!


I just love how clean and fresh these workspaces are. I love all of the white with pops of color here and there. I think a workspace should be somewhere you enjoy and want to be. It should feel comfortable and organized and reflect who you are. 

When I saw this last little office space, I fell in love with the brass lamp. I have done some research and have found that these little brass things are quite expensive. That doesn't stop me of dreaming of my perfect little work space with my perfect little brass lamp. 


This West Elm one is more doable at $99, but just not as pretty


What kind of work space do you dream of? Do you have one item you drool over? Do you love brass task lamps as much as I do?

Until Next Time,

Monday, March 4, 2013

The Headboard

I am not quite sure why it has taken so long to write this post, but it's been a long time coming. When we moved into our first apartment as newlyweds, I decided I really wanted a headboard. Of course, me being me, I wanted to find something second hand and fix it up rather than buying something new. Yes, to save money, but also because I really enjoy projects. I was a frequent visitor of the Habitat for Humanity Restore in Lexington, and on one of my visits I found a headboard for $10. It was just a plain, wooden headboard, but it was in great shape and could easily be painted. I bought it and somehow thought I could load it into my small SUV all by myself. Sometimes my independence gets the best of me. I broke off one of the legs in my attempt to get it in the car. I figured Jake's stepdad, Dan, would be able to fix it, so I brought it over to him.

A week later, he tells me he can build me a better headboard and wanted to know if there was anything in particular that I liked. It just so happened I had just pinned this on my pinterest.
I followed the picture to a blog where I discovered  ana-white.com. If you haven't visited this site, you are missing out. She has TONS of detailed plans for furniture as well as posts from people who have used her plans. I found complete directions, including woodcuts, for the headboard on this site. I sent it straight to Dan, who was excited to see the plan and happened to have enough wood for the project. He did such a good job! It looked exactly like the plan and it didn't even take him long to make. We are so lucky to have Dan who can make us awesome things! 

The next issue was the finish. I, surprisingly, decided I didn't want to paint it. The natural wood was so pretty that I just couldn't cover it up. I decided I wanted to stain it, but I wanted a grey stain. I thought this would be very simple, as Lowes had a few options for grey stains. I picked one out and went home to try it. One word...BLUE. Every single grey stain I tried looked blue. Not only did it look blue, the stain looked like a paint, rather than a stain. Blue was definitely not what I was going for. I wanted it to look slightly rustic/weathered, so I decided to try a new route instead of store bought stain. I found a recipe online that called for apple cider vinegar and steel wool soaked together for 48 hours. After lots of trial and error, I am so happy with how it turned out.


This is the headboard with 2 coats of the apple cider vinegar/steel wool mixture. I then applied two coats of polyurethane. 

Here is the headboard in our room. How great does it look?? The thing I like most is that it is so versatile and can go with lots of different colors of furniture or decor. I also like how it looks like a different color depending on the light. Sometimes it looks grey, other times it looks brown, and from time to time it looks green/blue. It is a piece that I think we will have for years to come. 

Our bedroom is my favorite part of our apartment. It is not huge, but if feels spacious because it opens up into the sunroom. When we moved to Virginia, we also bought a new mattress. I can't even describe to you how amazing it is to have a good quality mattress. It is embarrassing to admit, but with a headboard, somewhat matching furniture, and a nice mattress, I finally feel like a real adult. 


Here is the other wall of our bedroom (opposite of the bed), and then that's about it for the room. You can kind of see the opening to the sunroom in this picture. I like the simplicity. It feels comfortable and relaxing and I love going to bed at the end of the day in this room. At some point, maybe at our next location, I will hang more pictures or decorations. One day I would also like to add a chair/bench and possibly a vanity.

Until next time,

J and M

Saturday, February 9, 2013

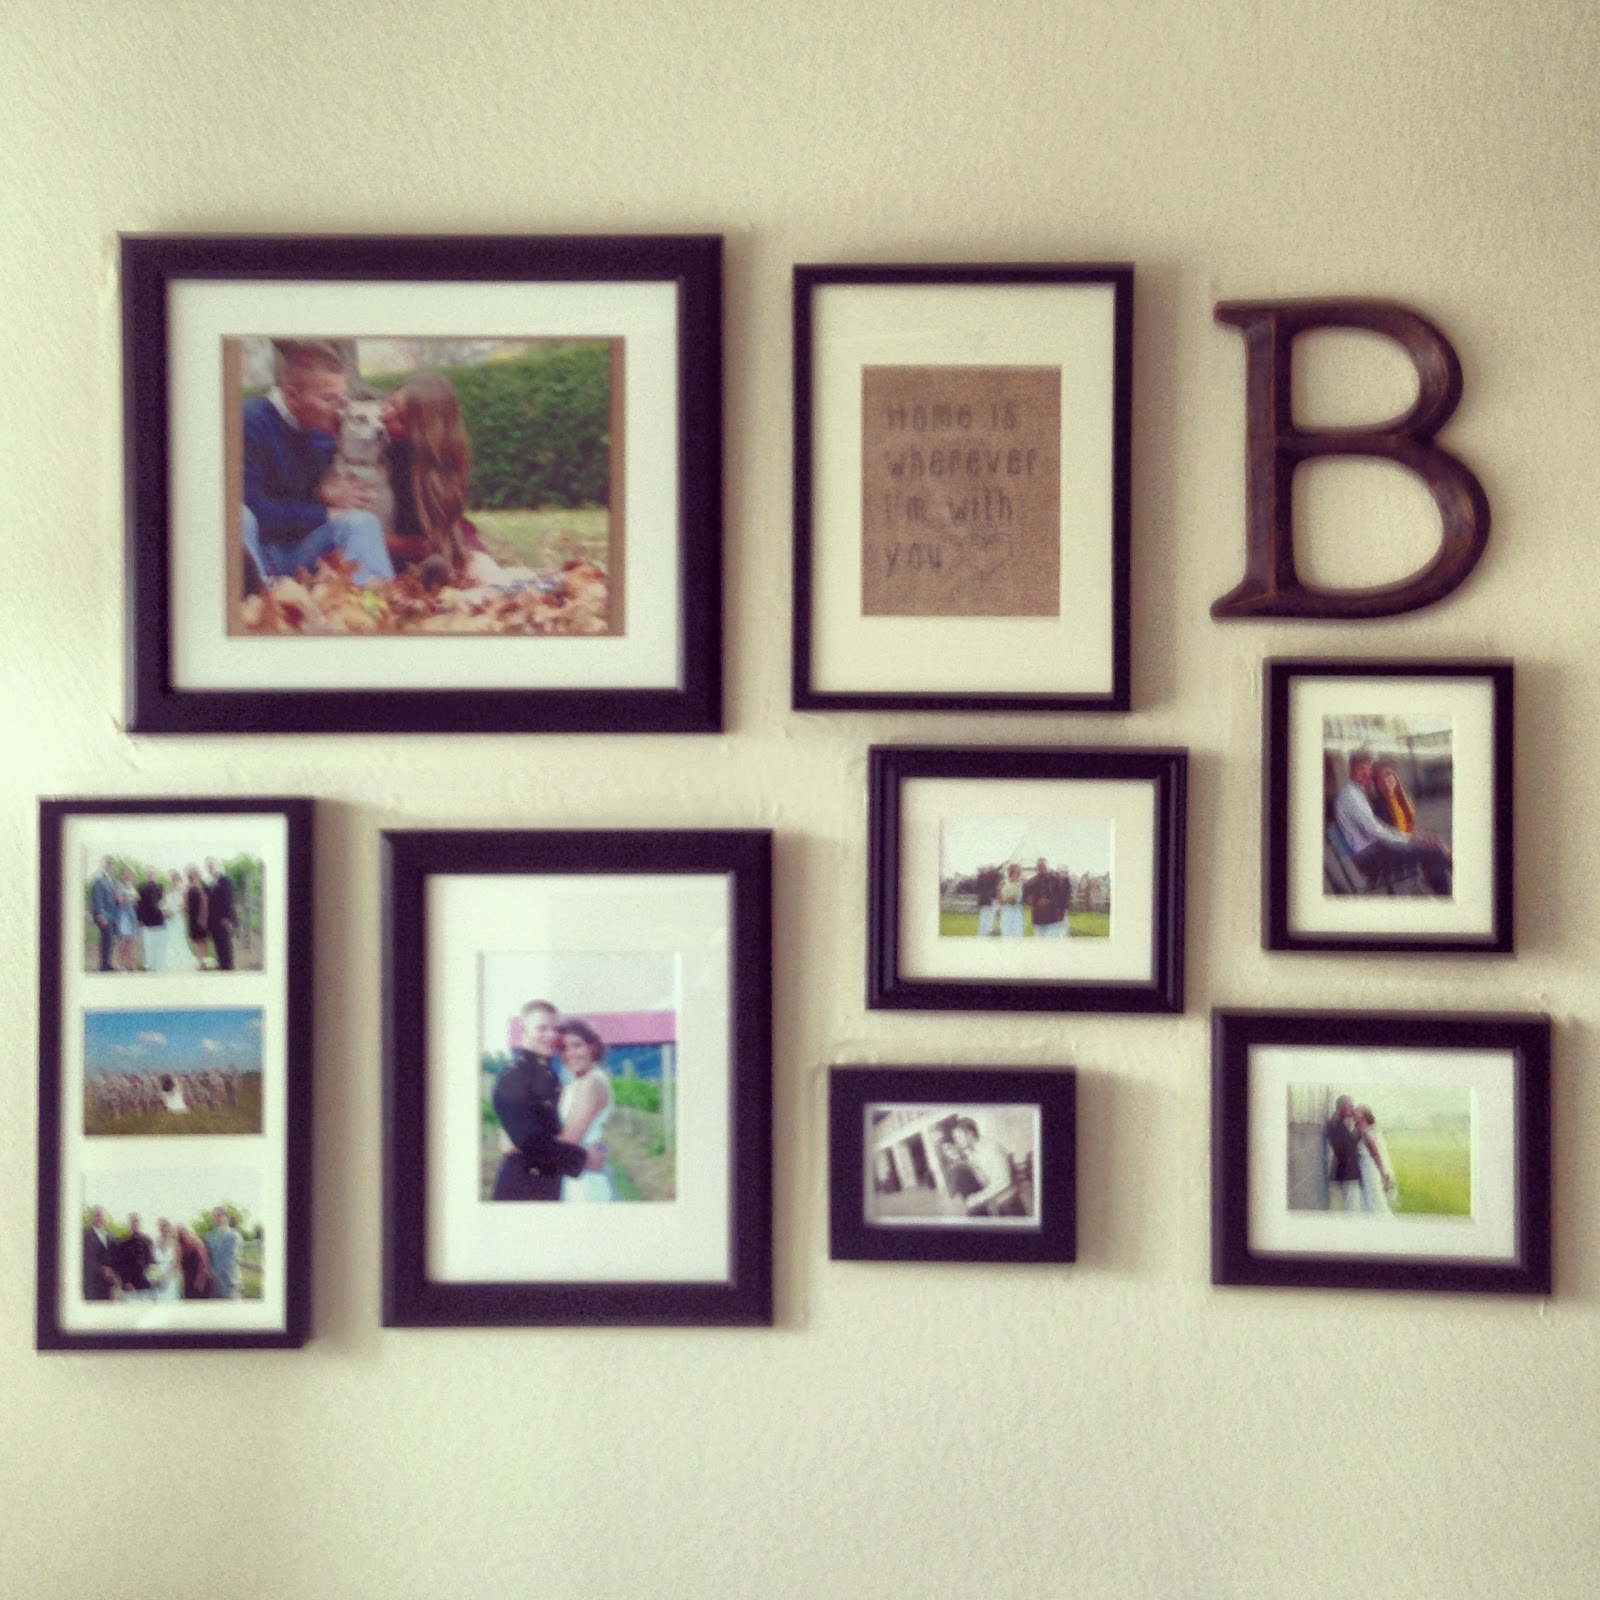
Gallery Wall

I decided that I really like gallery walls. It is a great way to fill up a large wall and to display tons of great photos. So I headed out to Ikea and loaded up on frames. If you are looking for cheap frames, Ikea is the place for you. I got 8 frames of all sizes for around $60. I looked through all of my pictures and found my favorite ones. I loaded them onto CVS.com and had them printed in the sizes I needed. Disclaimer for Ikea frames... they are from Sweden so they are not American picture sizes. I then looked for inspiration via pinterest.


Then, I got an awesome black and gold B from Hobby Lobby for $9.99. This might be my favorite part of the entire wall!

This is where I got stuck, for a long time. I laid out all of my frames about 10 times, trying to decided how I wanted them. I also contemplated not even hanging them up since we won't be in the apartment for very long. 

That's when I was inspired to make this. And I am proud to say, I was not "pinterest" inspired for this one. It was all from my own brain, and from luck. 

I thought the quote was fitting for our lifestyle. At some point, I might put up a tutorial. It turned out so well and was actually very easy.

This is where I decided that it was time to just do it, hang up the gallery wall.

So I read lots of different tutorials, and came up with my own method. Honestly, it is sooo much easier than people make it out to be. It took about an hour and only a little help from my cute husband.

First, lay out all of your frames on the ground, exactly how you want them. Play around a little bit to find the best layout. Take a picture, just in case it gets messed up.


Measure the distance apart each frame is from one another. It doesn't have to be exact.

Grab the largest frame and put it on the wall where you think it looks best. You can measure, but I honestly just eyeballed it. I had Jake hold the frame while I leveled(thanks Iphone app!) and then put a piece of tape along the top, keeping it leveled. I then took the frame down and measure out each side of the frame with a piece of tape and put them on the wall. I then picked  another frame and measured how far the top and side were from the first frame and made marks. I held the second frame up the the marks, leveled, and taped it off. I repeated this for all of the frames.

Weird picture, but you get the idea. Entire gallery wall taped on the wall.

Measure where the nail holder is on each of the frames and then mark it on the wall. Put in a nail and hang them up.

That's all there is too it! 

The most important tip: It doesn't have to be perfect! This was hard for me to come to terms with, but once I did, I was so much happier.


I am so happy with the way it turned out. It's not perfect by any means but it really makes the place feel like home. I have decided that no matter where we go and no matter the amount of effort, I will hang up pictures. Pictures really make a home more cozy and spices things up. 

Until next time,

J and M