Showing posts with label DIY. Show all posts

Monday, November 18, 2013

Just Another Weekend

This weekend was fairly relaxed. Like I said on Friday, I was motivated to get organized. I can say that I spent a lot of Saturday organizing our room and office. Who doesn't love spending Saturday organizing their coupon stash? It did feel great to get organized and clean. On Friday I also said I had some new books to read. I read Catching Fire in 24 hours. I had forgotten how much I love to read and how well it gets your mind off of stress and "to-do" lists. It was nice to get lost in another world for awhile. I am more than half way through Mockingjay and can't wait to finish.

Sunday, after finishing Catching Fire, I decided it was time to get out and about. Curry is really popular here and I had been wanting to try it. Before I had even arrived in Okinawa I had heard about Coco Curry. People say its addicting and once you try it, you crave it all the time. I found one close to our house and decided it was time to try it. I had originally thought that it was a fast food place, but upon walking in I found that it looks like a waffle house inside. The menu is huge. You can get different things in your curry, such as hamburger, chicken, pork, seafood, vegetables, etc. They also have about 8 different spice levels you can get. I got the pork curry, regular spice. I also got the cheese naan. It was really good and super filling. I am glad I tried it, but I'm probably not as crazy over it as everyone else.


Coco Curry was right next to a 100yen store, so of course I had to wander around for awhile. I also wandered around a department store across the street. I picked up some Christmas stuff and some DIY supplies. To me, it is so interesting to wander around and see different products. I have noticed that they have quite a few stores that hold it all, furniture, food, clothes, hardware, you name it.

I also decided to wander around a local grocery store. I had heard they have different flavor KitKats here, like mango and benimo(purple sweet potato). I unfortunately couldn't find any, but I will not give up my search. I did find some interesting products and bought some almond milk boxes. So good.


When I got home, I immediately decorated our teeny tiny Christmas tree. I don't normally decorate for Christmas this early, but I was excited about our tree. I would love to have a real tree like we usually get, but apparently getting a real one here is like Black Friday. People line up hours ahead of time and there is a mad dash to get a tree. I am not up to that this year and we won't even be here on Christmas. I didn't want to spend over $50 for a big fake one, either, because then you have to store it and all that. I am perfectly ok with our $4 little tree. 


I also did a little bit of Thanksgiving decor DIY. I have had a crafting itch lately, but getting supplies here isn't as easy as going to Michaels. You kind of have to happen upon things and then think up a way to use them. I made a Give Thanks banner and free-handed our chalkboard.


And that's it for my weekend. Pretty riveting, I know. 

Have a good week! I will be getting ready for the Holidays and hanging with friends!

How was your weekend? Do any DIY Projects? Did you eat at any new restaurants? Have you decorated for Christmas yet?


Linking up with Logan, Sami, and Kimberlee 

Monday, August 26, 2013

Work Space Inspiration


Since I have been living a nomadic lifestlye for the past 3 months, I haven't been able to do much designing, decorating, or DIY. I am going NUTS! I can't even buy any house things since our stuff is currently sitting in crates in Japan and we can't take much else over there. This is a big deal since I actually like shopping for house stuff more than I like shopping for clothes! I walk through Homegoods and Tj Maxx and get on pinterest and feel such a need to decorate something and then get sad when I realize I can't. I can't wait until we are settled in again so I can unleash my urge to decorate. 

Until then, I will just pin ideas I have and stay far away from home decor shops. Lately I've been loving cute little home offices. I usually do my work in bed or on the couch, but I think it would be so nice to have a little work space to sit on the computer and to organize papers and junk. I am sure any office space we have in the near future will be small, but I have seen so many inspiring images of small workspaces I know I could make it work. 


You should go look at the rest of this cute apartment. It is GORGEOUS!


I just love how clean and fresh these workspaces are. I love all of the white with pops of color here and there. I think a workspace should be somewhere you enjoy and want to be. It should feel comfortable and organized and reflect who you are. 

When I saw this last little office space, I fell in love with the brass lamp. I have done some research and have found that these little brass things are quite expensive. That doesn't stop me of dreaming of my perfect little work space with my perfect little brass lamp. 


This West Elm one is more doable at $99, but just not as pretty


What kind of work space do you dream of? Do you have one item you drool over? Do you love brass task lamps as much as I do?

Until Next Time,

Wednesday, May 8, 2013

Spring Wreath

I thought I would share a little DIY project because it was probably one of the easiest (and cheapest) projects I have ever done. No seriously, a few supplies and a few minutes. That's my kind of DIY!

MATERIALS
(Hobby Lobby and Michaels sale plain ones in different sizes for very cheap)
hot glue gun
glue sticks
fake flowers: $5
(I would recommend trying the dollar store)
wooden letter: $1.99
(Michaels and Hobby Lobby both sale wooden letters of different sizes)
ribbon: $2.99

Total: $12-$15


You may need to start by painting your wooden letter. In my case, my letter was already the color I wanted it to be. Place a line of hot glue on the top and bottom of your wooden letter. Place the letter on the right side, towards the top, of your wreath. Set the glued parts on areas where the wreath sticks out for better hold. Hold the letter for about a minute. Next, pick your biggest flower and put glue on the bottom. Also put glue where you will be placing it, diagonally across from the wooden letter, on the wreath. Press the flower to the glue and hold for a minute. You may need to add more glue to the undersides of the petals in order for the heavy flower to stay. Work your way out on either side of the first flower, by glue the bottom of each flower and then where you will place it on the wreath. Once all of your flowers are in place, string a piece of ribbon through the top, back side of the wreath. pull the ends up and tie a bow. Now you are ready to hang out wreath! 

I suggest using suction cups or command strips upside down on the inside of your door to hang it. I figured this out after some trail and error. Works like a charm!


Until next time,

M


Monday, March 4, 2013

The Headboard

I am not quite sure why it has taken so long to write this post, but it's been a long time coming. When we moved into our first apartment as newlyweds, I decided I really wanted a headboard. Of course, me being me, I wanted to find something second hand and fix it up rather than buying something new. Yes, to save money, but also because I really enjoy projects. I was a frequent visitor of the Habitat for Humanity Restore in Lexington, and on one of my visits I found a headboard for $10. It was just a plain, wooden headboard, but it was in great shape and could easily be painted. I bought it and somehow thought I could load it into my small SUV all by myself. Sometimes my independence gets the best of me. I broke off one of the legs in my attempt to get it in the car. I figured Jake's stepdad, Dan, would be able to fix it, so I brought it over to him.

A week later, he tells me he can build me a better headboard and wanted to know if there was anything in particular that I liked. It just so happened I had just pinned this on my pinterest.
I followed the picture to a blog where I discovered  ana-white.com. If you haven't visited this site, you are missing out. She has TONS of detailed plans for furniture as well as posts from people who have used her plans. I found complete directions, including woodcuts, for the headboard on this site. I sent it straight to Dan, who was excited to see the plan and happened to have enough wood for the project. He did such a good job! It looked exactly like the plan and it didn't even take him long to make. We are so lucky to have Dan who can make us awesome things! 

The next issue was the finish. I, surprisingly, decided I didn't want to paint it. The natural wood was so pretty that I just couldn't cover it up. I decided I wanted to stain it, but I wanted a grey stain. I thought this would be very simple, as Lowes had a few options for grey stains. I picked one out and went home to try it. One word...BLUE. Every single grey stain I tried looked blue. Not only did it look blue, the stain looked like a paint, rather than a stain. Blue was definitely not what I was going for. I wanted it to look slightly rustic/weathered, so I decided to try a new route instead of store bought stain. I found a recipe online that called for apple cider vinegar and steel wool soaked together for 48 hours. After lots of trial and error, I am so happy with how it turned out.


This is the headboard with 2 coats of the apple cider vinegar/steel wool mixture. I then applied two coats of polyurethane. 

Here is the headboard in our room. How great does it look?? The thing I like most is that it is so versatile and can go with lots of different colors of furniture or decor. I also like how it looks like a different color depending on the light. Sometimes it looks grey, other times it looks brown, and from time to time it looks green/blue. It is a piece that I think we will have for years to come. 

Our bedroom is my favorite part of our apartment. It is not huge, but if feels spacious because it opens up into the sunroom. When we moved to Virginia, we also bought a new mattress. I can't even describe to you how amazing it is to have a good quality mattress. It is embarrassing to admit, but with a headboard, somewhat matching furniture, and a nice mattress, I finally feel like a real adult. 


Here is the other wall of our bedroom (opposite of the bed), and then that's about it for the room. You can kind of see the opening to the sunroom in this picture. I like the simplicity. It feels comfortable and relaxing and I love going to bed at the end of the day in this room. At some point, maybe at our next location, I will hang more pictures or decorations. One day I would also like to add a chair/bench and possibly a vanity.

Until next time,

J and M

Saturday, February 9, 2013

Gallery Wall

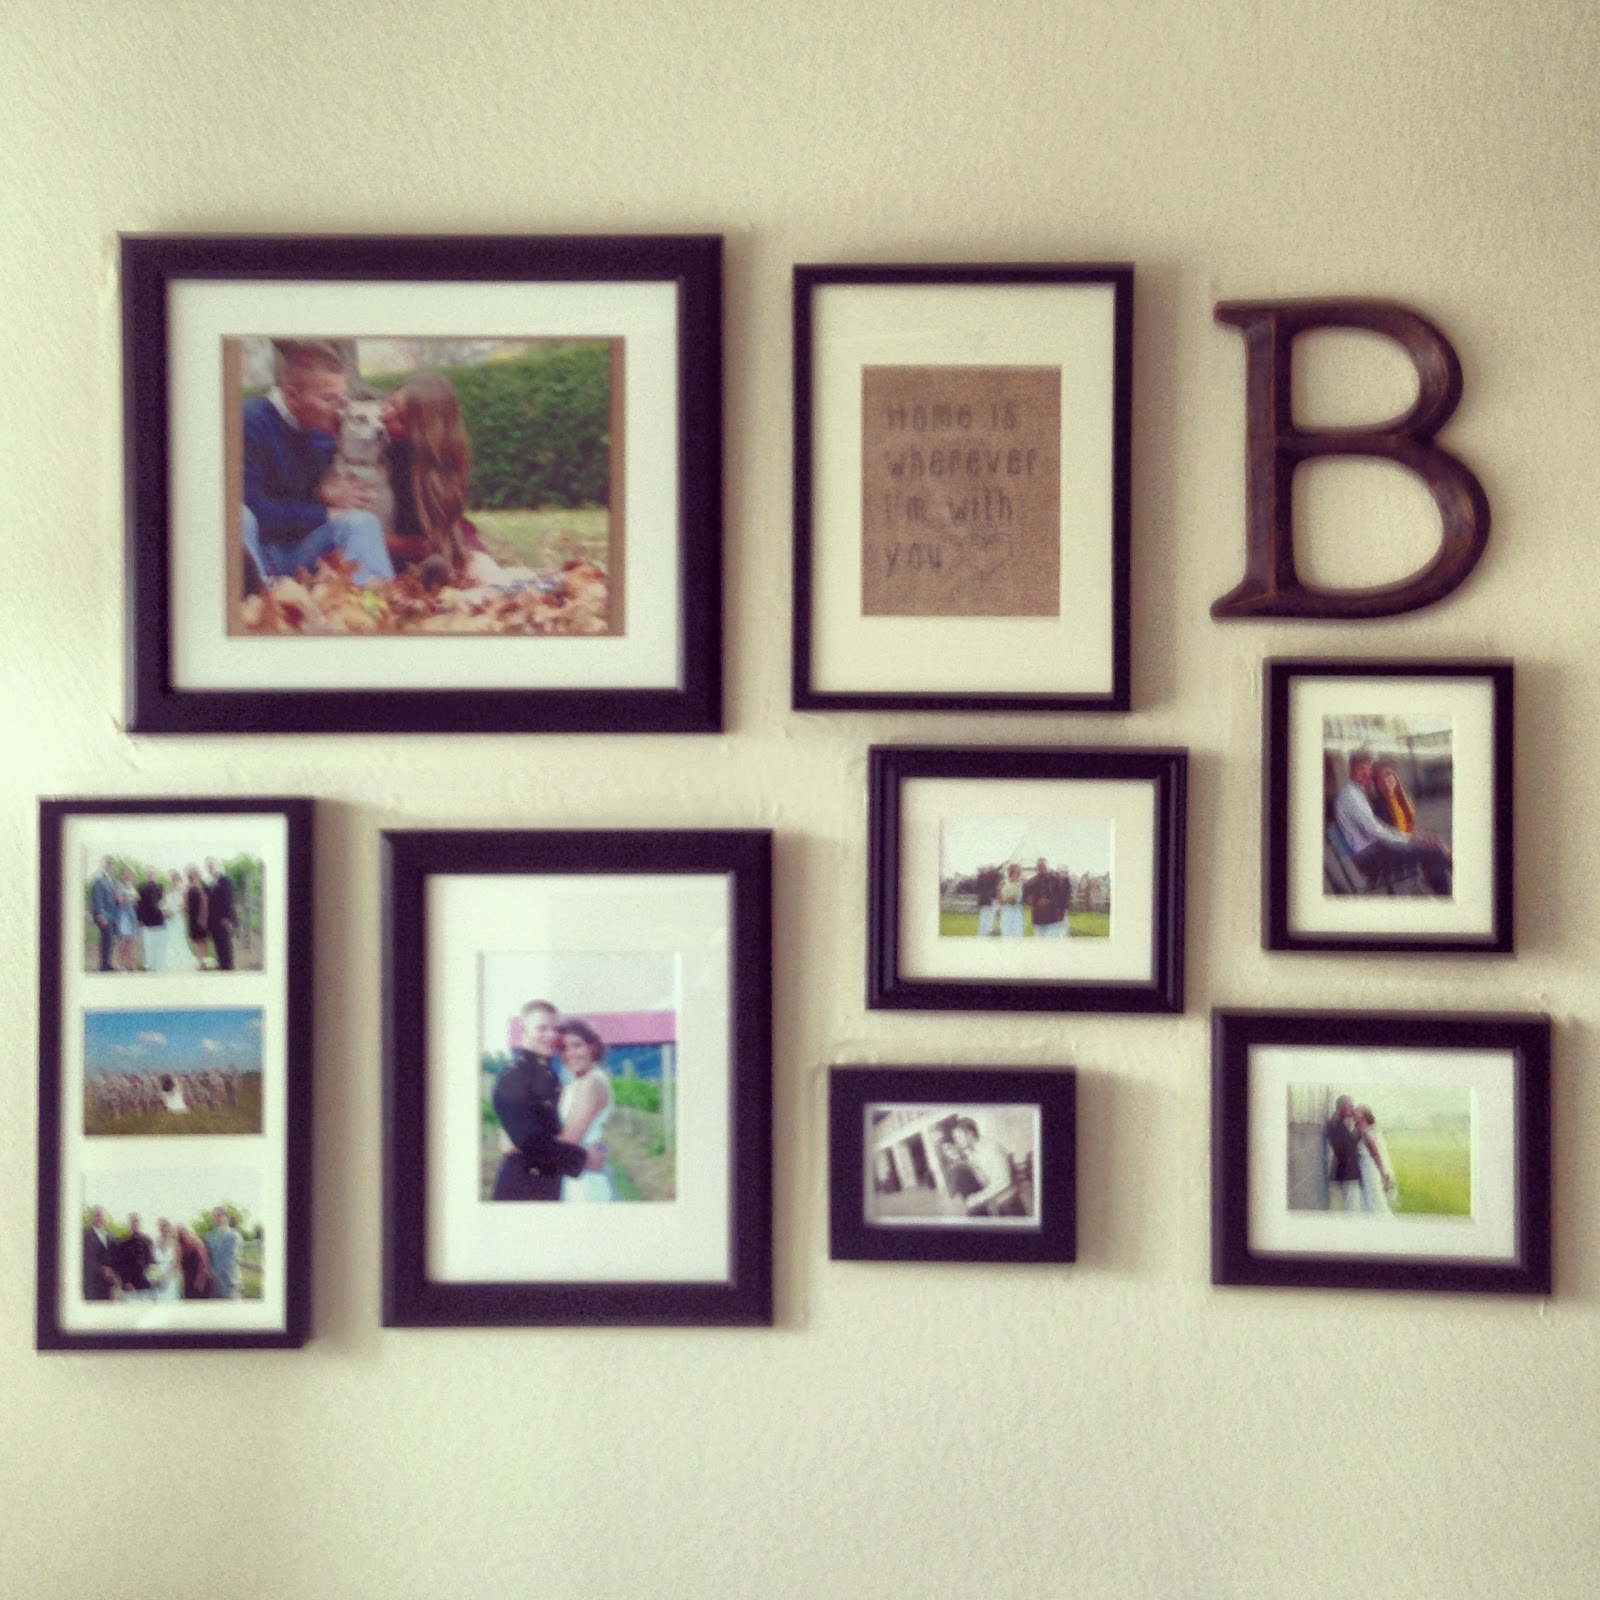
I decided that I really like gallery walls. It is a great way to fill up a large wall and to display tons of great photos. So I headed out to Ikea and loaded up on frames. If you are looking for cheap frames, Ikea is the place for you. I got 8 frames of all sizes for around $60. I looked through all of my pictures and found my favorite ones. I loaded them onto CVS.com and had them printed in the sizes I needed. Disclaimer for Ikea frames... they are from Sweden so they are not American picture sizes. I then looked for inspiration via pinterest.


Then, I got an awesome black and gold B from Hobby Lobby for $9.99. This might be my favorite part of the entire wall!

This is where I got stuck, for a long time. I laid out all of my frames about 10 times, trying to decided how I wanted them. I also contemplated not even hanging them up since we won't be in the apartment for very long. 

That's when I was inspired to make this. And I am proud to say, I was not "pinterest" inspired for this one. It was all from my own brain, and from luck. 

I thought the quote was fitting for our lifestyle. At some point, I might put up a tutorial. It turned out so well and was actually very easy.

This is where I decided that it was time to just do it, hang up the gallery wall.

So I read lots of different tutorials, and came up with my own method. Honestly, it is sooo much easier than people make it out to be. It took about an hour and only a little help from my cute husband.

First, lay out all of your frames on the ground, exactly how you want them. Play around a little bit to find the best layout. Take a picture, just in case it gets messed up.


Measure the distance apart each frame is from one another. It doesn't have to be exact.

Grab the largest frame and put it on the wall where you think it looks best. You can measure, but I honestly just eyeballed it. I had Jake hold the frame while I leveled(thanks Iphone app!) and then put a piece of tape along the top, keeping it leveled. I then took the frame down and measure out each side of the frame with a piece of tape and put them on the wall. I then picked  another frame and measured how far the top and side were from the first frame and made marks. I held the second frame up the the marks, leveled, and taped it off. I repeated this for all of the frames.

Weird picture, but you get the idea. Entire gallery wall taped on the wall.

Measure where the nail holder is on each of the frames and then mark it on the wall. Put in a nail and hang them up.

That's all there is too it! 

The most important tip: It doesn't have to be perfect! This was hard for me to come to terms with, but once I did, I was so much happier.


I am so happy with the way it turned out. It's not perfect by any means but it really makes the place feel like home. I have decided that no matter where we go and no matter the amount of effort, I will hang up pictures. Pictures really make a home more cozy and spices things up. 

Until next time,

J and M

Thursday, July 19, 2012

The Dresser

Here is a dresser that my Mother-in-Law gave us. It was the very first bedroom suite her and Jake's dad had when they were married, which I think is pretty cool. It is in great shape and is a well made piece of furniture. But, as you can see, it is not much to look at. So, I decided to give it a make over!


I started out by taking the hardware off and then lightly sanding it. I knew that I could not just paint this piece without sanding it with a high-powered sander or priming it, so I decided to go with primer. I had heard about this Kilz spray primer on a couple of blogs and decided to try it out. It worked so well! It was also super easy to apply. I just sprayed on a few coats and then sanded it down a bit after it was dry. The thing that I have learned with spray, though, is that it is hard to get it really even. The one thing about this particular primer is that it takes a lot to coat something. The dresser took 2 entire bottles.
Here is the dresser with the primer
Jake wanted to get all new hardware, but I did some research and found that the hardware we liked ran from $4-$12. This dresser requires 12 handles, so it would have cost us quite a bit to get all new hardware. I actually love the original handles and finally convinced Jake that I could make them look great. I bought a metallic silver spray paint and painted all of the handles.

After I primed the dresser, I used a flat black paint over the entire thing. Wow, it took forever, but it turned out so great!! I really like the way the flat black looks with the shiny silver handles. I also painted a mirror to go with it.

Here is the finished product!


Here are a few things I learned from this project:
-Good primer is a MUST
-The finish does make a difference. Flat has a completely different look than gloss, etc.
-Spray paint takes a lot less time than paint, but is less even.
-Polyurethane anything that is going to get a lot of use

Until next time,

J and M


Tuesday, July 3, 2012

Very First Furniture Painting Experience

Disclaimer: I do not plan on starting a blog devoted to DIY since I do not have the time, patience, or money, but I thought it would be fun to record my experiences. Maybe some of you fellow amateur DIYers can learn from my mistakes.

My Mother-in-law gave me this coffee table for my house with my college friends. It has been a great coffee table and I actually really like the style. I decided it would be a good "color pop" piece in our new apartment. I wasn't quite sure how to go about painting a piece of furniture, so I did some research. I found that you do not always have to sand a piece before painting it, which was a relief because I do not have a sander. I also found that you can spray paint furniture rather than use plain old paint. I also decided I wanted to paint it blue, not a baby blue, but a light, greenish blue. I wandered the aisles of Lowes today trying to figure out exactly what I wanted to do. I found ready made Valspar paint samples in a color I really liked. So I decided to go with regular paint instead of trying the spray paint.


I started by lightly (very lightly) sanding the coffee table with a sandpaper cube. I decided to forgo primer, because I wanted a worn look with the wood showing through. Not sanding first really worked for this piece because I liked the wear and tear. After I sanded it, I wiped it off and began painting it in long strokes with a regular paintbrush, simple as that.

Or so I though. Little did I know it was going to storm right in the middle of this project. I was under my porch, but the wind blew the rain in right after I was done with my first coat. I kept moving the table, but old house means leaky roofs and water all over the table. Finally, the rain slowed and I was able to salvage my piece. I really liked the wood showing through after the first coat, but continued on to the second. I really liked how the paint looked, but I was not sure about the color. It turned out more baby blue than I was hoping.

so here is the before
And after


I wasn't sure how I felt about the table at this point and was starting to question my creative ability. I thought maybe I needed to do something else with it. Then, Jake came home and told me how much he hated it. He thought that it was too blue, which I agreed with. So the next day I headed out to Lowes (again) and bought some glaze. I sanded around the edges of the table to give it the aged look. Then, I mixed the clear glaze with some black paint that I had. I then glazed the table by painting on the glaze and then immediately wiping it off. I am so happy with the way it turned out and so is Jake. It looks great in our apartment and gives the right amount of color to the room. I consider my first furniture painting a success!

Here it is!

Until next time,

J and M